
If you’re craving the comforting warmth of a freshly baked cookie but want something a little different, the Chocolate Chipless Cookies Recipe is an absolute game-changer. This unique cookie skips the classic chocolate chips yet delivers everything you love about rich, buttery cookies with a beautifully caramelized flavor thanks to browned butter. The texture is perfectly soft with just the right amount of crisp edges, making every bite pure cookie bliss.
Ingredients You’ll Need
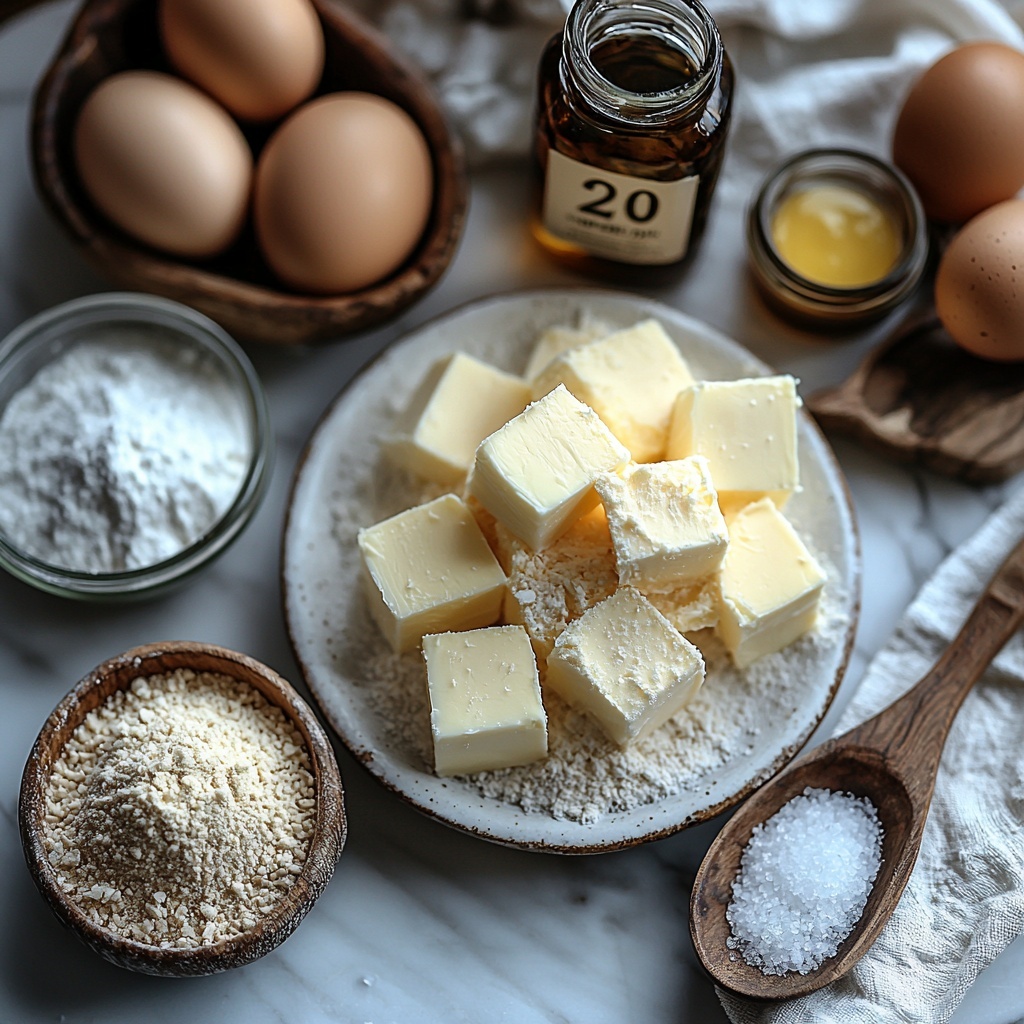
These ingredients are simple staples but each one plays a vital role in making your cookies flavorful, tender, and irresistibly golden. From the nutty depth of browned butter to the delicate chewiness contributed by cornstarch, every element counts.
- Unsalted butter (1 cup): Browning it brings out a rich, nutty flavor that’s the heart of these cookies.
- All-purpose flour (2 1/4 cups): The foundation that gives structure without weighing the cookies down.
- Cornstarch (1 tablespoon): Adds tenderness and softness to the cookie crumb.
- Baking soda (1 teaspoon): Helps the cookies rise just enough for that perfect puff.
- Sea salt (1 teaspoon): Balances the sweetness and enhances all the flavors.
- Brown sugar (1 cup): Brings moisture and a subtle molasses depth for chewiness.
- Granulated sugar (3/4 cup): Adds sweetness and helps achieve crisp edges.
- Large egg (1) and egg yolk (1): Together they provide richness and stability to the dough.
- Vanilla extract (2 1/2 teaspoons): Infuses a warm, aromatic essence throughout the cookies.
How to Make Chocolate Chipless Cookies Recipe
Step 1: Brown the Butter
Start by melting your unsalted butter slowly over medium heat in a heavy-bottomed saucepan. Keep a close eye and stir occasionally until it turns a beautiful caramel color and releases a nutty aroma. This step transforms the flavor completely, setting your cookies apart.
Step 2: Mix the Dry Ingredients
In a separate bowl, whisk together the all-purpose flour, cornstarch, baking soda, and sea salt. Combining these dry ingredients beforehand ensures even distribution, so your cookies bake uniformly with the perfect texture.
Step 3: Cream the Butter and Sugars
Once the browned butter has cooled to room temperature, use a stand mixer or hand mixer to combine it with brown sugar and granulated sugar. Creaming these until smooth creates a soft, flavorful base that holds moisture well and gives a lovely chew to your cookies.
Step 4: Add the Eggs and Vanilla
Incorporate the large egg, egg yolk, and vanilla extract into the creamed butter and sugar mixture. Mixing these well adds richness and a lovely aromatic sweetness that is key to bringing out the full cookie flavor without needing chocolate chips.
Step 5: Combine Wet and Dry Ingredients
Gradually add the flour mixture to the wet ingredients, mixing just until combined. Be careful not to overmix here, as that can toughen your cookies. A few gentle folds are all you need to keep the dough tender and light.
Step 6: Chill the Dough
Refrigerate the cookie dough for at least one hour, though longer is even better if you have time. Chilling solidifies the fats and enhances the flavor development, making your cookies more flavorful and less likely to spread too much while baking.
Step 7: Prepare to Bake
Preheat your oven to 350°F (175°C). Line baking sheets with parchment paper to prevent sticking and ensure even baking. This step sets you up for perfectly baked cookies with clean bottoms and no fuss.
Step 8: Shape and Bake
Portion the chilled dough into equal-sized balls—using a cookie scoop helps with consistency. Place them spaced adequately on your prepared sheets and bake for 8–10 minutes. Keep an eye for golden-brown edges, which signal they’re perfectly done.
Step 9: Cool and Enjoy
Allow the cookies to rest on the baking sheet for a few minutes after you pull them from the oven. This resting time lets them firm up just right before you transfer them to a wire rack to cool completely. Then get ready for some serious cookie love!
How to Serve Chocolate Chipless Cookies Recipe
Garnishes
While these cookies are incredible on their own, you can elevate them with light dustings of powdered sugar or a sprinkle of flaky sea salt to highlight the browned butter’s nutty notes. Adding a smear of homemade fruit jam or a dollop of whipped cream on the side can make them feel extra special for guests.
Side Dishes
Pair these cookies with a cold glass of milk, a steaming cup of coffee, or a rich hot chocolate for a truly indulgent experience. Their buttery sweetness balances well with these beverages, making every bite more delightful and comforting.
Creative Ways to Present
For a fun twist, serve the cookies alongside fresh fruit slices or cheese platters during casual get-togethers. Wrapping them individually in parchment with a cute ribbon also makes for charming homemade gifts or party favors that are sure to impress without the need for chocolate chips.
Make Ahead and Storage
Storing Leftovers
Once cooled, store your cookies in an airtight container at room temperature to keep them soft and flavorful for up to five days. Layering them between sheets of parchment paper prevents sticking and preserves the texture beautifully.
Freezing
You can freeze the dough itself or the baked cookies for later enjoyment. Shape the dough into balls and freeze on a tray before transferring to a zip-top bag for convenience. Baked cookies freeze well wrapped tightly and can be stored for up to three months without losing quality.
Reheating
To enjoy your Chocolate Chipless Cookies Recipe cookies fresh from the oven even days later, quickly warm them in the microwave for about 10-15 seconds or reheat in a low oven. This revives their softness and buttery aroma wonderfully, reminding you of that just-baked magic.
FAQs
Do I really need to brown the butter?
Absolutely! Browning the butter is what gives these cookies their signature deep, nutty flavor, elevating the whole cookie experience without using chocolate chips.
Can I substitute the cornstarch with something else?
Cornstarch adds a tender crumb, but if you don’t have any, you can try using potato starch or arrowroot powder in the same amount. Whole wheat flour isn’t recommended as it can alter the texture significantly.
Why is the dough chilled for so long?
Chilling allows the fats to solidify and flavors to develop fully, resulting in cookies that spread less and have a more complex, buttery taste. It also makes the dough easier to handle.
How can I make these cookies vegan?
To make a vegan version, substitute the butter with a plant-based alternative and use a flax or chia egg in place of the eggs. Keep in mind that texture and flavor will vary slightly.
Will these cookies be as good without chocolate chips?
Definitely! The Chocolate Chipless Cookies Recipe shines precisely because it proves you don’t need chocolate chips to enjoy a delicious cookie. The browned butter and sugar combo creates rich, caramel-like notes that stand on their own beautifully.
Final Thoughts
If you want a cookie that’s uniquely comforting and bursting with buttery flavor, the Chocolate Chipless Cookies Recipe is a must-try. It’s a delightful twist that will surprise you with its simplicity and depth, quickly becoming one of your favorite go-to treats. So grab your ingredients, brown that butter, and enjoy every joyful bite!
Print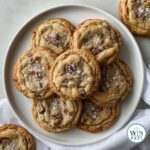
Chocolate Chipless Cookies Recipe
- Prep Time: 15 minutes
- Cook Time: 10 minutes
- Total Time: 1 hour 25 minutes
- Yield: 24 servings
- Category: Dessert
- Method: Baking
- Cuisine: American
Description
These Chocolate Chipless Cookies offer a rich, nutty flavor from browned butter and a chewy, tender texture without the addition of chocolate chips. Perfectly balanced with brown sugar and vanilla for a classic, buttery cookie experience.
Ingredients
Dry Ingredients
- 2 1/4 cups all-purpose flour
- 1 tablespoon cornstarch
- 1 teaspoon baking soda
- 1 teaspoon sea salt
Wet Ingredients
- 1 cup unsalted butter
- 1 cup brown sugar
- 3/4 cup granulated sugar
- 1 large egg
- 1 large egg yolk
- 2 1/2 teaspoons vanilla extract
Instructions
- Brown the Butter: In a heavy-bottomed saucepan, melt the unsalted butter over medium heat. Continue cooking until the butter turns a nutty, caramel color and emits a rich aroma. Remove from heat and allow it to cool to room temperature.
- Mix Dry Ingredients: In a separate bowl, whisk together the all-purpose flour, cornstarch, baking soda, and sea salt. Set aside.
- Cream Butter and Sugars: Using a stand mixer fitted with the paddle attachment, combine the cooled browned butter with the brown sugar and granulated sugar. Beat until the mixture is well combined and smooth.
- Add Eggs and Vanilla: Incorporate the large egg, egg yolk, and vanilla extract into the butter-sugar mixture. Mix on medium speed until the batter becomes smooth and homogenous.
- Combine Dry and Wet Ingredients: Gradually add the dry ingredient mixture into the wet ingredients, mixing carefully to avoid overworking the dough. Mix just until incorporated.
- Chill the Dough: Cover the dough and refrigerate for at least one hour, or longer if possible. This step helps enhance the flavors and ensures a better texture during baking.
- Preheat Oven & Prepare Baking Sheets: Set your oven to 350°F (175°C). Line baking sheets with parchment paper to prevent sticking.
- Portion and Bake: Scoop the dough into evenly sized balls and place them on the prepared baking sheets. Bake for 8 to 10 minutes, or until the edges turn golden brown but the centers remain soft.
- Cool the Cookies: Allow the cookies to cool on the baking sheet for a few minutes post-baking. Then transfer them to a wire rack to cool completely.
Notes
- Browned butter adds a deep, nutty flavor that elevates these cookies beyond a standard butter cookie.
- Chilling the dough is essential for texture and flavor development; if time permits, chill for several hours or overnight.
- Do not overmix after adding the dry ingredients to prevent tough cookies.
- Use parchment paper for easy cleanup and to ensure cookies bake evenly without sticking.
- Cookies can be stored in an airtight container for up to 5 days.
